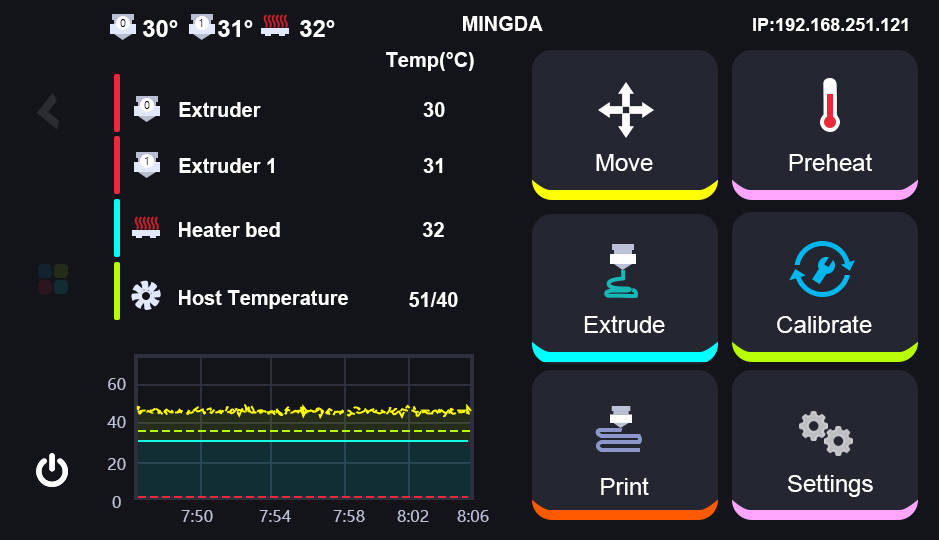
¶ Printer Calibration Guide
Printer calibration is essential for ensuring optimal performance. There are several important details to consider, so please review them carefully.
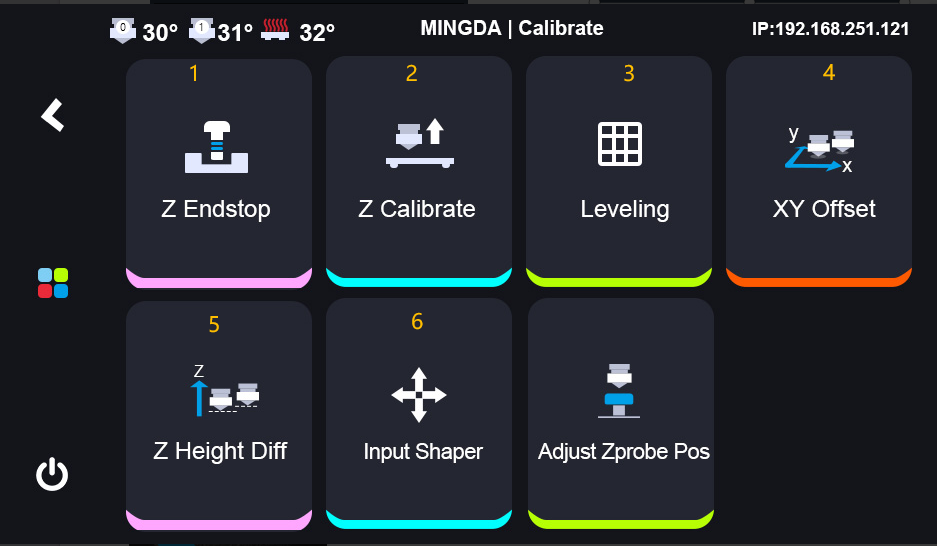
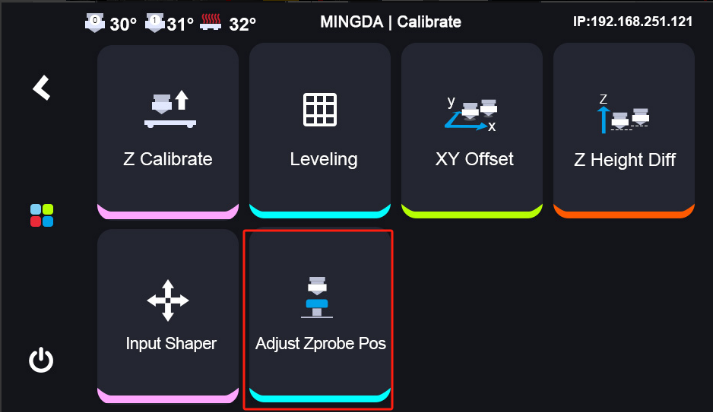
Please follow the sequence shown in the diagram to calibrate step by step.
Note: For the first time, the printer nozzle and bed no need to be cleaned. But fter the printer print something, the nozzle needs to be cleaned before calibration.
 |
 |
|---|
- Z Clibrate Clibration
This is used for calibrating the leveling sensor which installed on the extruder.
Operation: Click Calibrate> Z Calibrate > Start
The same operation as the Z endstop calibration.
Place an A4 sheet of paper between the nozzle and the heated bed. Gradually lower the nozzle until it just begins to press against the paper, allowing the paper to slide with slight resistance. Once the optimal position is reached, accept the settings. Then save the value, and the printer will restart itself. - Auto-Leveling
This is used for calibrating the whole buildplate.
Operation: Click Calibrate> Leveling > Calibrate
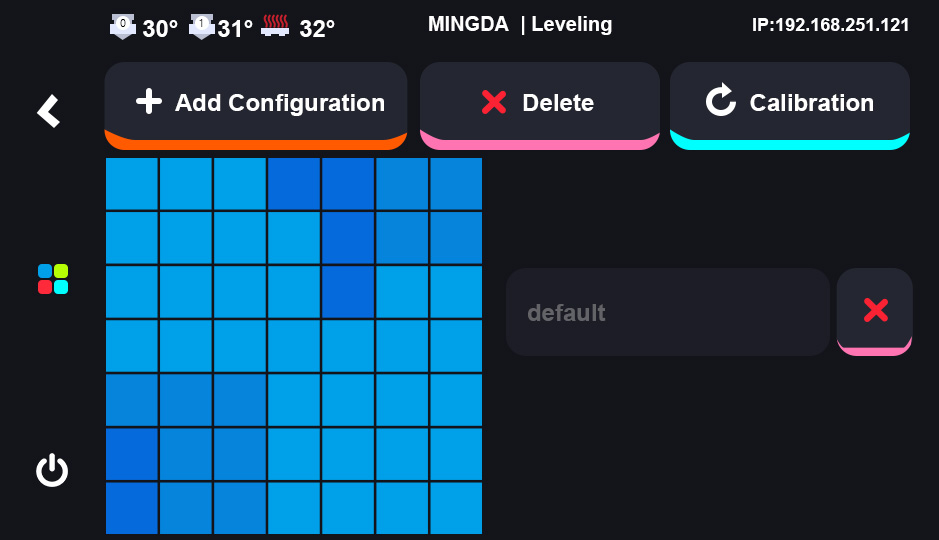
The printer will start autoleveling automatically after clicking Calibrate. And it will take around 2 minutes.
Before starting the leveling process, heat the bed to 60℃ and wait for 20 minutes. This allows for thermal expansion of the bed to stabilize, ensuring accurate leveling. - XY Offset Calibration
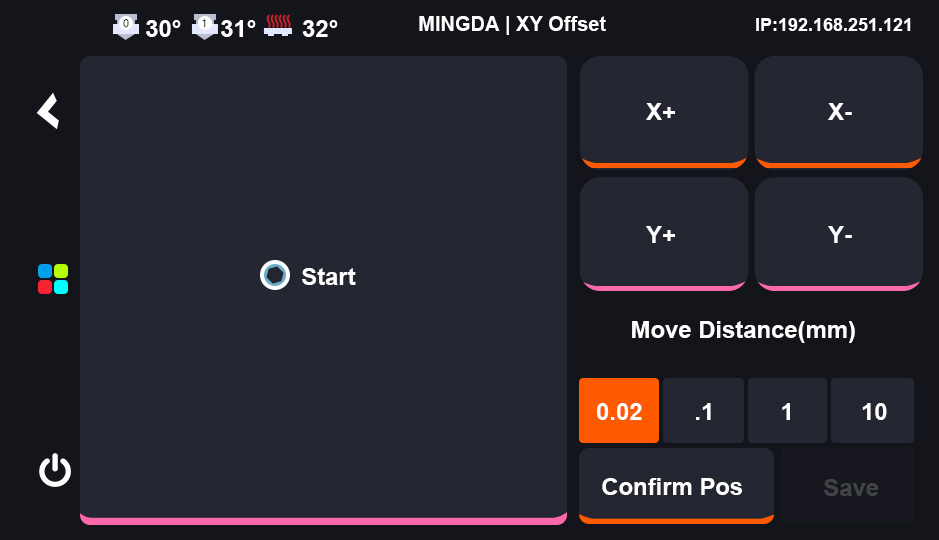
Operation: Click Calibrate> XY Offset > Start
This is used for confirming the nozzle possion.
| |
| |
|
- The cali-camera will light up after clicking "XY offset". After the camera LED lights up, click "Start", and the left extruder will move to the calibration camera's position automatically.
- Adjust the left extruder nozzle to align with the crosshairs of the screen and click "Confirm Pos", the right extruder will move upon the camera automatically.
- Adjust the right extruder nozzle to align with the crosshairs of the screen click Confirm Pos, then "Save". The printer will restart itself.
- Z Height Diff Calibration
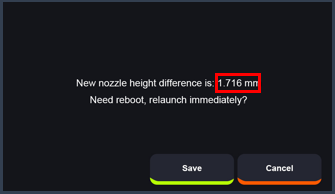
Operation: Click Calibrate> Z Height Diff > Start
This is used for confirming the nozzle height.
| |
| |
|
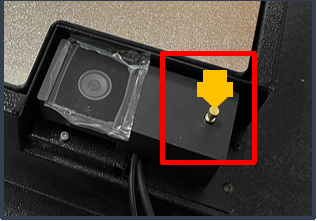
While calibrating the Z-axis offset, the extruder will move towards the sensor automatically. Please observe if the nozzle is positioned above the probe sensor. If not, use the Adjust Zprobe Pos function to adjust the nozzle. - Adjust Zprobe Pos
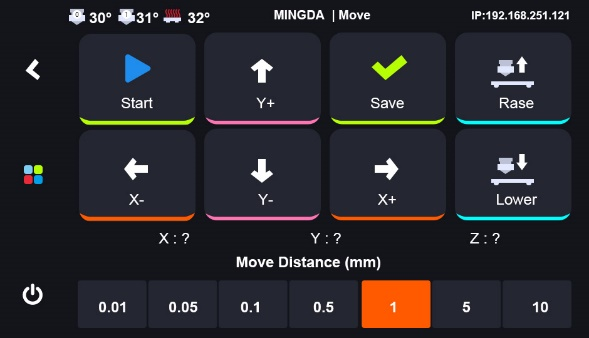
This is used for making the nozzle on the top center of the sensor manually.
| |
| |
|
Click “Start” and move the XYZ axes to position the nozzle directly above the center of the metal sensor. Then save the value. After that, perform the “Z Height Diff” procedure again. - Calibrate PID
This is used for calibrating the nozzle temperature.
|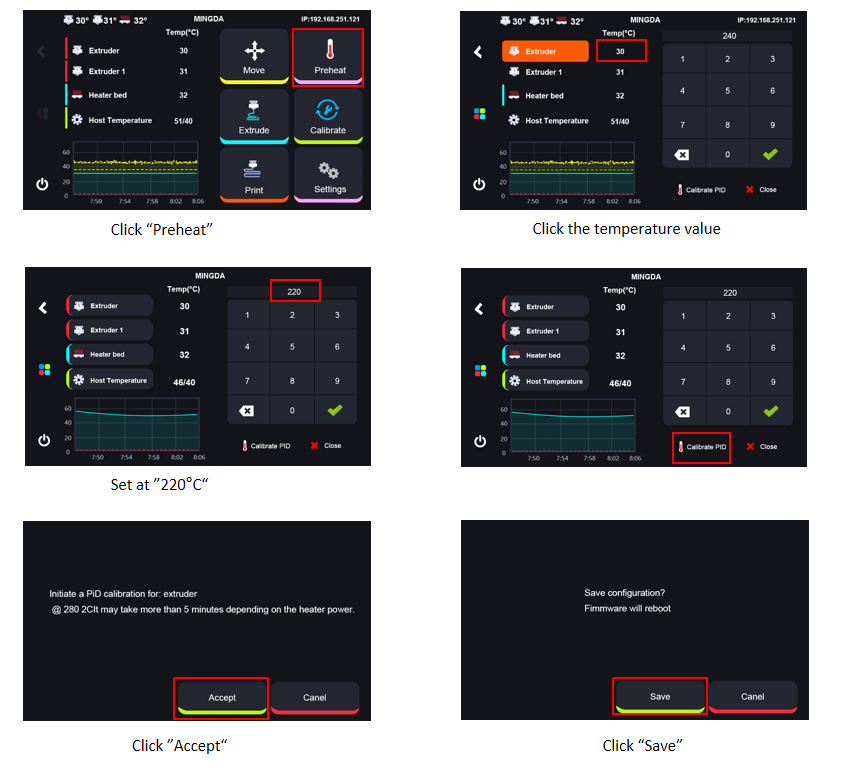 |
|
Before using the machine for the first time, it is essential to perform temperature calibration.
The nozzle's compensation values must be adjusted according to different ambient temperatures. Proper calibration ensures accurate and stable temperature control during printing, thereby improving print quality.